Yes, some birdseed will grow, but most commercial mixes give you uneven results at best. Whether you get lush sprouts, a few scraggly seedlings, or nothing at all depends almost entirely on what's in your mix, how it was stored, and whether the seeds were treated before packaging. The honest answer is: it's worth testing before you invest any real effort, because plenty of birdseed is effectively dead on arrival for germination purposes. will wild bird seed grow if planted
Will Birdseed Grow? How to Test and Grow It Successfully

Marcus Weir
24 Mar 2026
Will birdseed germinate: what's in it and why it matters
Most wild bird mixes are built from a short list of ingredients: black oil sunflower seed, millet (white or red proso), milo (sorghum), oat groats, wheat, corn, safflower, and sometimes nyjer (thistle) or peanuts. Each of those has a very different sprouting story. Sunflower and millet are your most reliable sprouters, especially if the seeds are intact and unprocessed. Milo is often dismissed as a filler that many birds won't even eat, and from a germination standpoint it's similarly hit-or-miss since its role in the mix is usually to add bulk cheaply. Oat groats and wheat can sprout but have typically been hulled or processed in ways that kill the germ. Corn kernels in bird mixes are often cracked, which ends any chance of germination.
The bigger issue is treatment and storage. Some commercial birdseed has been treated with fungicides or insecticides to protect it during shipping and shelf life. Treated seed can still look perfectly normal but may have compromised germination and vigor. Beyond treatment, storage conditions matter enormously. Seed viability drops fast when it's exposed to heat or humidity, and there's a useful rule of thumb from the seed industry: if the temperature in Fahrenheit plus the relative humidity percentage adds up to more than 100, you're in deterioration territory. A warm garage in summer or a humid shed will quietly kill germination potential without changing how the seed looks or smells.
So the short version: sunflower and millet are your best bets in most mixes. Everything else is uncertain, and a meaningful portion of any bagged bird mix may have zero germination potential regardless of how carefully you plant it. Everything else is uncertain, and a meaningful portion of any bagged bird mix may have zero germination potential regardless of how carefully you plant it.
How to test whether your birdseed will sprout today
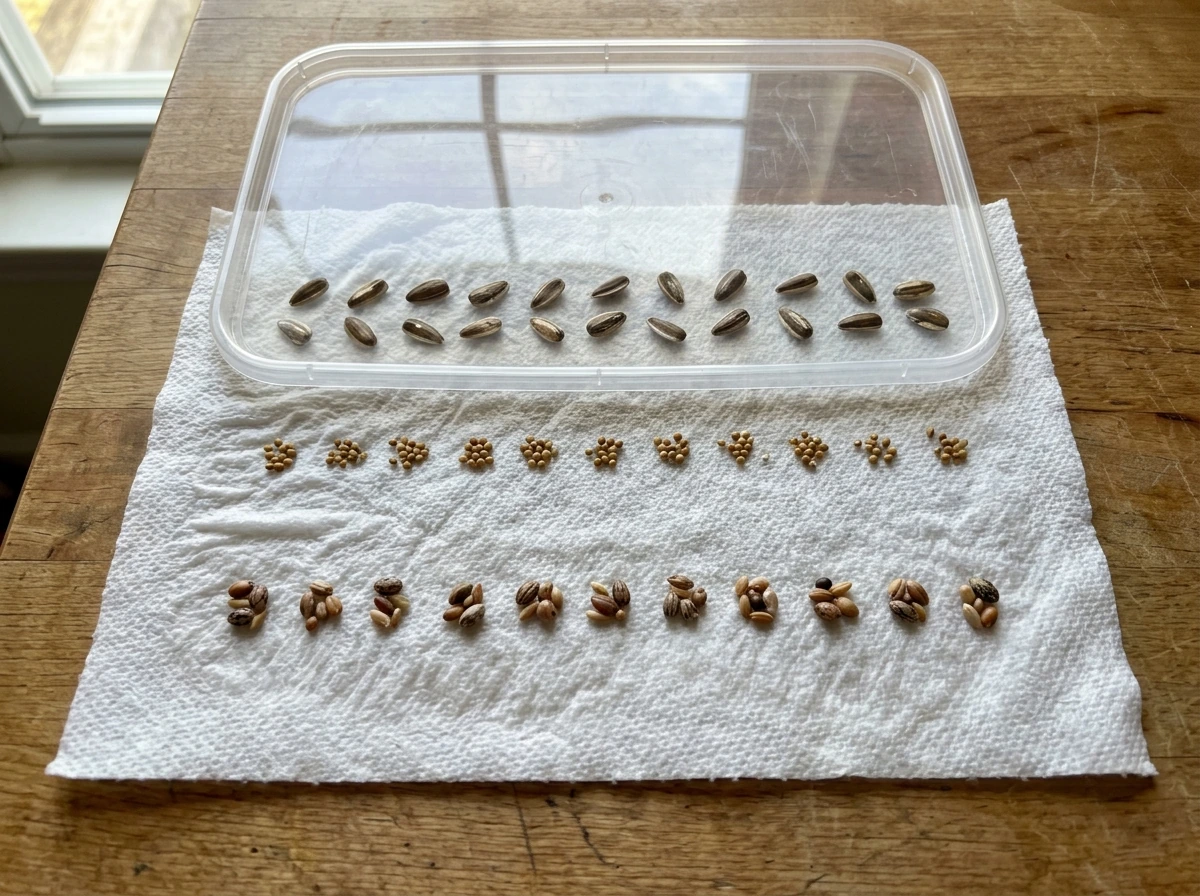
Before you plant anything, run a quick paper towel germination test. It takes about five to ten minutes of setup and gives you a real answer within a few days. Separate out the main seed types in your mix as best you can, because testing them together just muddles the results.
- Dampen a paper towel or a folded piece of blotter paper until it's moist throughout but not dripping. Squeeze out any excess water.
- Count out ten seeds of one type (sunflower, millet, or whatever you want to test) and space them evenly across one half of the paper towel.
- Fold the other half of the towel over the seeds to sandwich them in place.
- Slip the whole thing into a plastic bag or container to hold in moisture and label it with the date and seed type.
- Keep it somewhere consistently warm, around 20 to 25°C (68 to 77°F). A kitchen counter away from direct sun works well.
- Check daily starting on day two or three. Millet and sunflower should show a root tip (radicle) within two to five days if they're viable.
- After seven days, count how many seeds have sprouted versus how many haven't moved at all. If you get seven or more out of ten, the viability is good enough to work with.
If you get fewer than five sprouting out of ten, that's a red flag. You can still try, but expect a patchy result. If you get zero after a full week, the seeds are likely treated, dead, or so degraded that planting them is a waste of time.
Best conditions to get sprouting (moisture, temperature, light, depth)
Once you've confirmed viability, conditions determine how fast and how evenly things move. Here's what actually matters.
Moisture
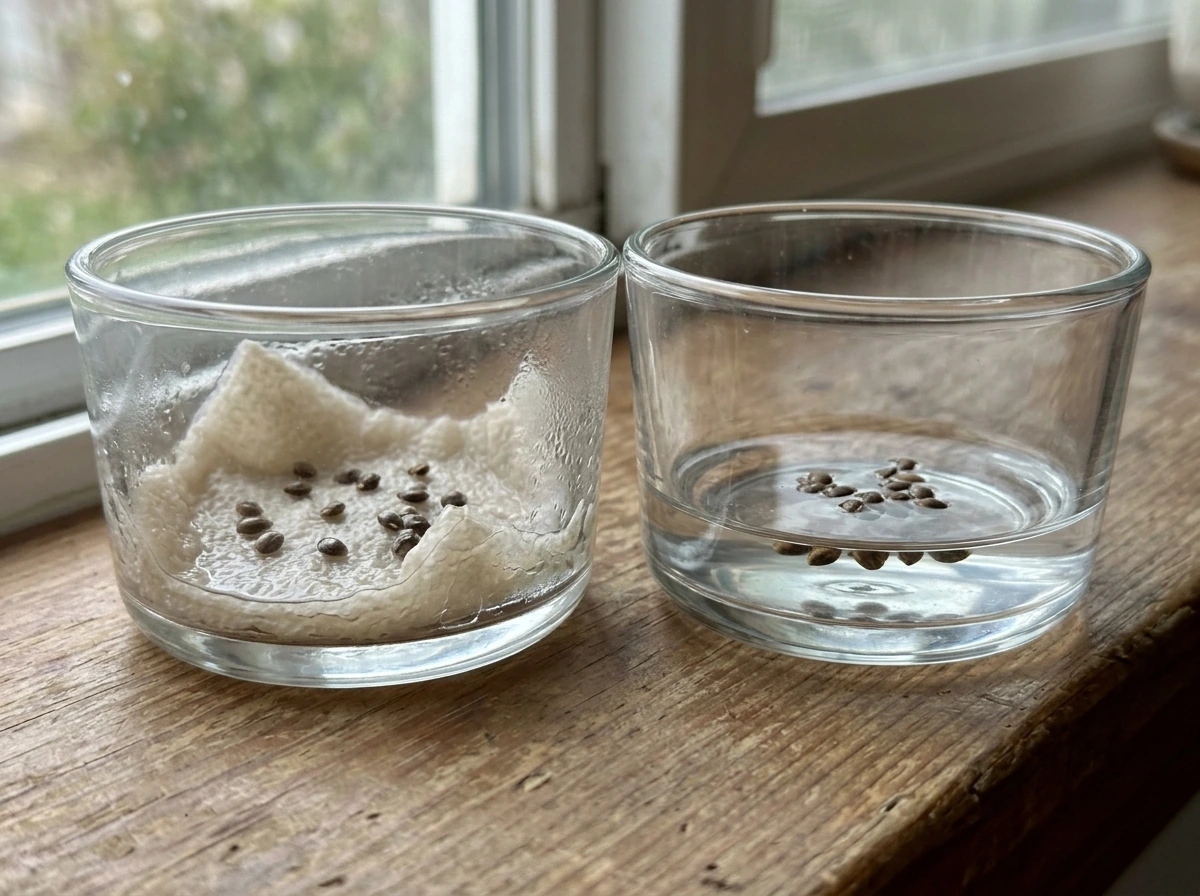
Seeds need consistent moisture to germinate, but standing water kills them fast by cutting off oxygen. The sweet spot is damp but well-drained. Seed moisture above roughly 25% starts the germination process, but much above that in storage causes rot. When you're actively sprouting, you want seeds to stay visibly moist without sitting in a puddle. Rinse and drain them a couple of times a day if you're using a jar or tray method.
Temperature
Most birdseed seeds germinate well between 15 and 30°C (59 to 86°F). A steady room temperature of around 20 to 25°C is ideal for most of what you'll find in a typical wild bird mix. Cold conditions slow germination dramatically and can cause seeds to rot before they sprout. If your space dips below 15°C regularly, expect poor or very slow results.
Light vs. dark
For the initial sprouting phase, most of these seeds actually don't need light. Darkness is fine, and in some cases preferred. Once you've got visible sprouts with a root tip and a small shoot, that's when light becomes important if you want green growth rather than pale, leggy stems. Sunflower greens, for example, benefit from a specific approach: pre-sprout in the dark for the first couple of days, then move into indirect light to green up.
Depth (if planting in soil)
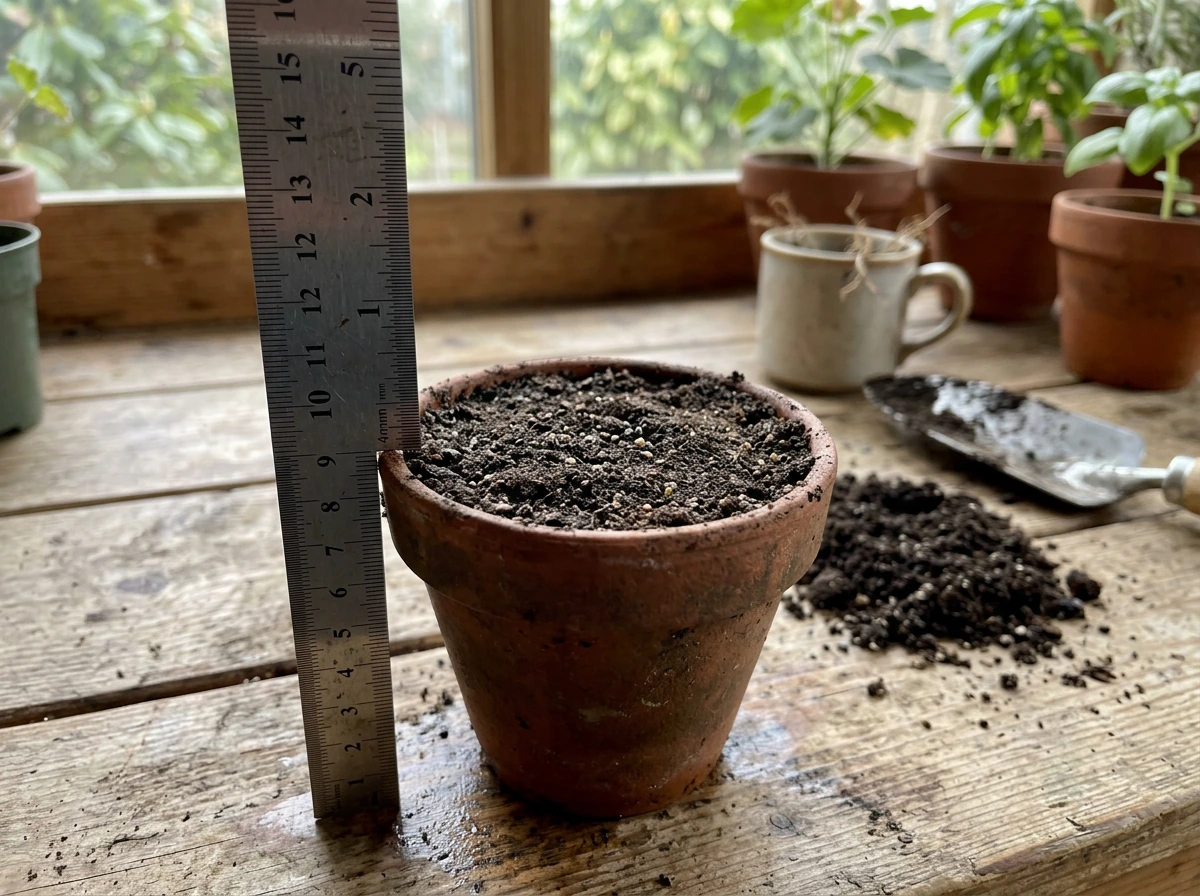
If you're going into soil rather than sprouting in a jar or tray, small seeds like millet should only be covered with about 3 to 6mm (roughly a quarter inch) of soil. Black oil sunflower seeds can go a bit deeper, around 1 to 2.5cm (half to one inch). Planting too deep is one of the most common reasons birdseed fails to emerge outdoors.
Step-by-step: growing birdseed as a crop or greens at home
There are two practical paths here: sprouting for quick greens (harvest in days) or growing into full plants (weeks to months). Both start the same way, but split after the first few days.
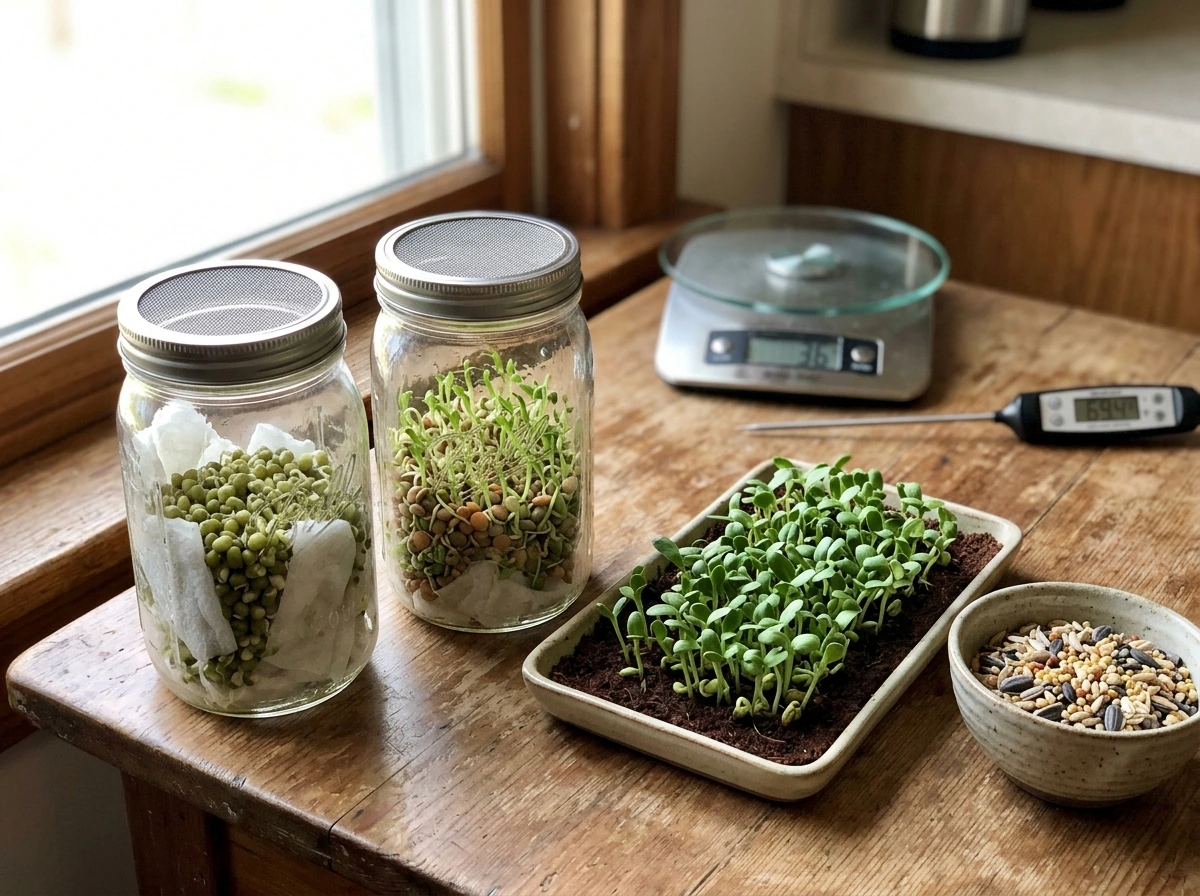
Growing sprouts or microgreens (5 to 10 days)
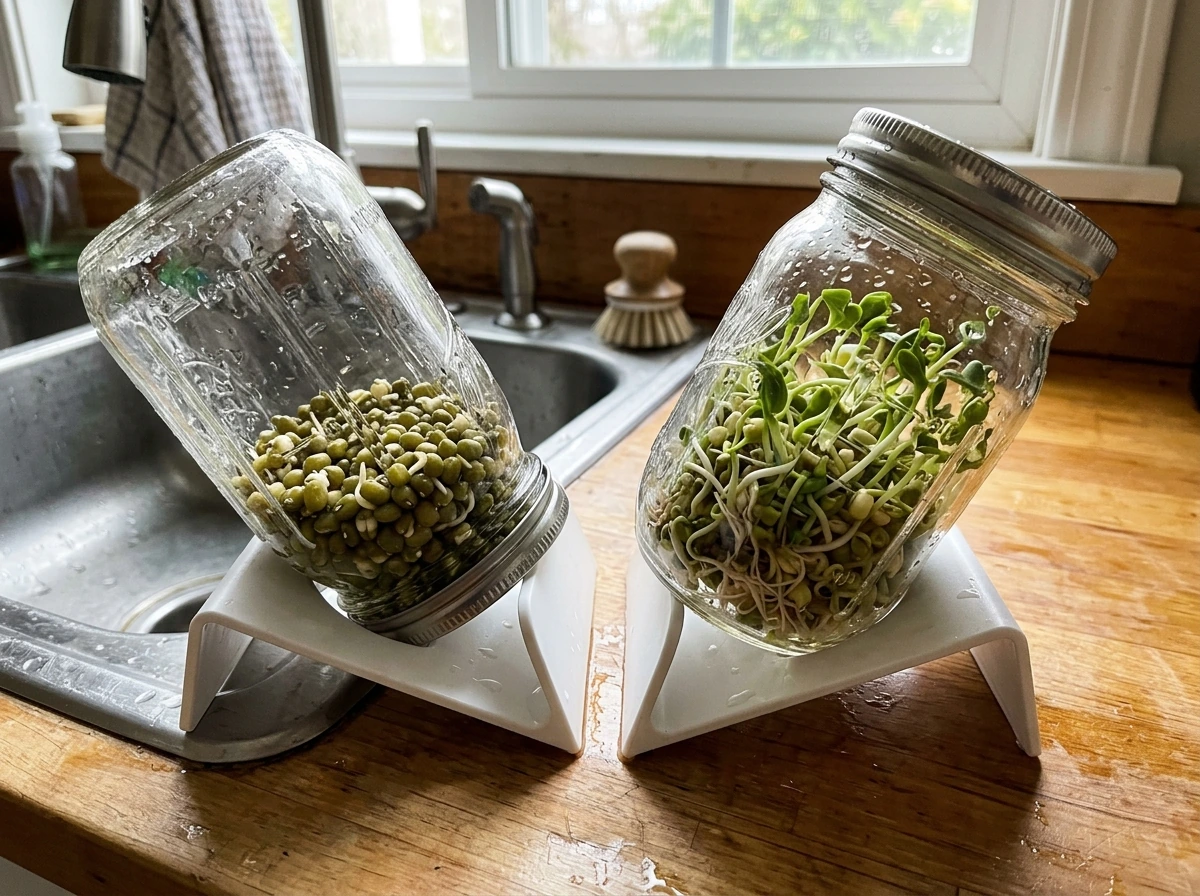
- Soak your seeds first. Millet needs about 6 to 8 hours in water. Sunflower (unhulled) needs just 1 to 2 hours. Drain completely after soaking.
- Place the soaked seeds in a wide-mouth jar with a mesh or cheesecloth lid, or spread them thinly on a sprouting tray. Don't stack them more than one seed deep if you can help it.
- Rinse with fresh water and drain thoroughly two to three times per day. This keeps moisture up and prevents CO2 buildup and mold.
- Keep the container in a warm spot (20 to 25°C) away from direct sun for the first few days.
- After two to three days you should see small root tails on millet and sunflower. That's your green light.
- Move the sprouter into indirect light if you want green leaves to develop. Sunflower greens in particular need this step to turn from yellow to green.
- Harvest when sprouts are 2 to 5cm tall, typically between days five and ten depending on temperature and seed type.
Growing into soil (full plants)
- Pre-soak seeds as above, then plant into moist, well-draining seed-starting mix or garden soil.
- Scatter millet seeds on the surface and cover very lightly with 3 to 6mm of soil. Plant sunflower seeds 1 to 2.5cm deep, one per cell or 10 to 15cm apart outdoors.
- Keep the soil consistently moist but not waterlogged. A spray bottle helps avoid disturbing small seeds.
- Germination usually appears within 3 to 7 days for millet and 5 to 10 days for sunflower under good conditions.
- Thin seedlings once they have their first true leaves, leaving the strongest plant in each spot.
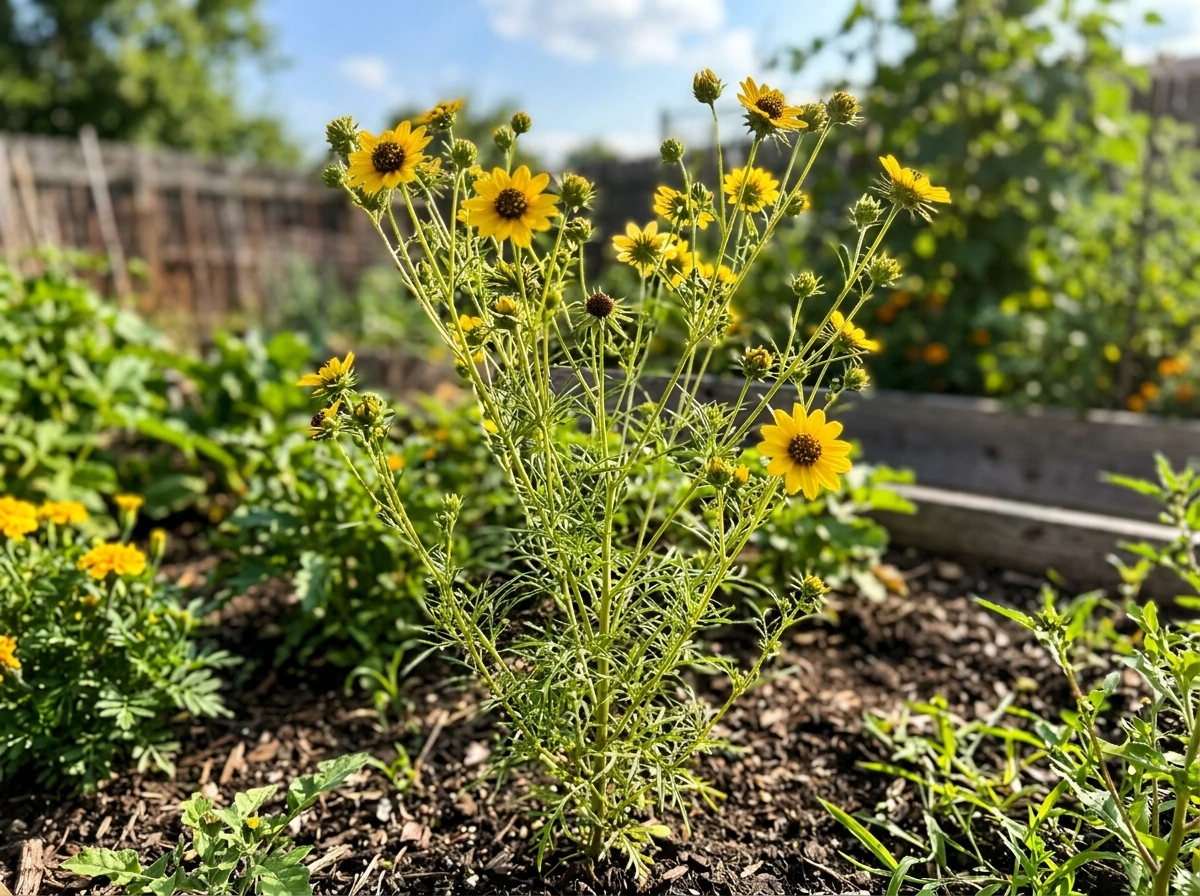
- Sunflowers grown from black oil seed will produce smaller heads than garden varieties, but they're perfectly functional as cut flowers or for harvesting seeds again.
Common results: what you'll likely get (and what you usually won't)
Here's the honest breakdown of what you can realistically expect depending on your mix and its condition.
| Seed type | Sprouting likelihood | What you'll realistically get |
|---|---|---|
| Black oil sunflower (unhulled) | High, if intact and untreated | Good sprouts or full plants; smaller heads than garden varieties |
| White/red proso millet | High, if intact and untreated | Fast, reliable sprouts; small grass-like greens |
| Milo/sorghum | Moderate | Patchy germination; often a filler that underperforms |
| Oat groats | Low (usually hulled/processed) | Rarely sprout; the germ is often removed during processing |
| Wheat | Low to moderate | May sprout if whole; often processed in mixes |
| Cracked corn | None | Cracking destroys the germ; will not sprout |
| Safflower | Moderate | Can sprout but germinates slowly and unevenly |
| Nyjer/thistle | Very low | Usually heat-sterilized before sale to prevent invasive spread |
| Peanuts (in shell or whole) | Low in mixes | Occasionally germinates but mold risk is high in humid conditions |
The most common real-world result is partial sprouting: your sunflower and millet seeds do something useful, and everything else just sits there or rots. If you're working with a premium black oil sunflower-heavy mix and it was stored in a cool, dry place, you can get very good germination rates. If you've got a bargain mix that's heavy on milo and cracked corn and has been sitting in a warm shed since last winter, expect close to nothing.
When to stop: signs the seeds won't germinate or are unsafe
Not every sprouting attempt is worth continuing. Pull the plug and start fresh (or give up on that batch entirely) if you notice any of these:
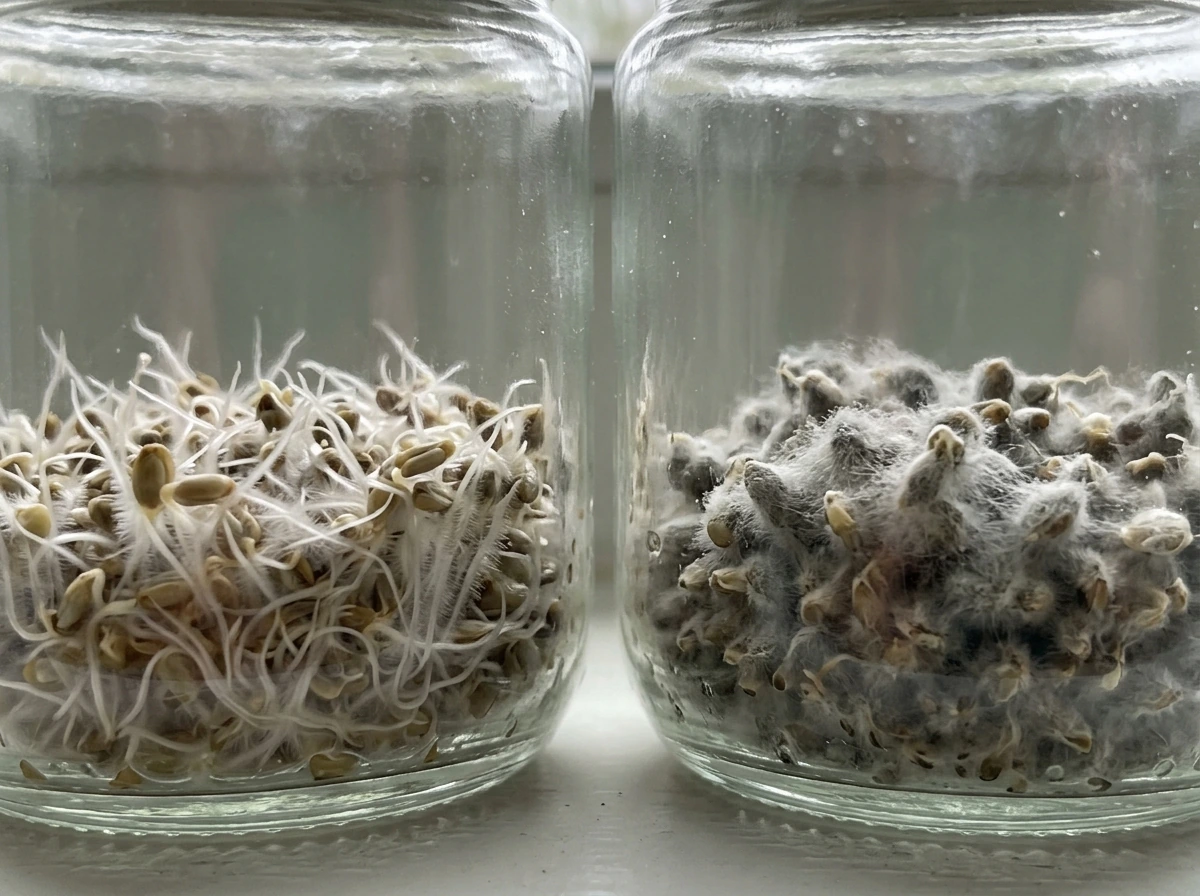
- Visible mold or fuzzy growth on the seeds after 48 to 72 hours. A little white root fuzz is normal, but actual fuzzy gray, green, or black mold is not. Mold at this stage usually means the seeds were already compromised or conditions are too wet.
- A sour or fermented smell coming from the sprouting container. Healthy sprouts smell clean and faintly green. Anything off means bacterial or fungal activity has taken hold.
- Zero root tips after seven full days under correct temperature and moisture conditions. If nothing has moved, the seeds are dead or sterile (nyjer is routinely sterilized before sale precisely to prevent it from establishing in the wild).
- Sliminess on the seeds themselves. This is a sign of bacterial rot, not germination.
- Seeds that swell and then collapse or shrivel without sprouting. This usually means the germ was dead before you started, often from improper storage where moisture crept above safe levels.
If your germination test came back below 50% (fewer than five out of ten seeds sprouting), that batch is genuinely not worth planting at scale. Use it as bird feed as intended and buy fresh, untreated seed if sprouting or growing is what you're after.
Using sprouts responsibly: pests, mold, and feeding/growth safety
If you do get successful sprouts, there are a few things to keep in mind before you eat them yourself or feed them back to birds.
Human consumption safety
Raw sprouts, including the kinds you'd grow from birdseed, are considered a higher-risk food by health authorities. The warm, moist conditions that make sprouting work are exactly the conditions that also encourage bacterial growth, including pathogens like Salmonella and E. coli. If you plan to eat the sprouts yourself, make sure your equipment is thoroughly sanitized before use, rinse seeds with clean water every time, and keep everything at a consistent temperature without letting it fluctuate. People who are pregnant, elderly, very young, or immunocompromised should avoid eating raw sprouts altogether. Cooking sprouts briefly eliminates most of the risk if you're in any of those categories.
Feeding sprouts to birds
Sprouted birdseed can actually be a nutritional upgrade over dry seed when fed back to birds. The sprouting process increases digestibility and boosts certain nutrients. That said, only offer sprouts that look and smell clean. Any moldy, slimy, or foul-smelling sprouts should go straight in the compost, not the feeder. Mold in a bird feeder can cause serious illness in birds, particularly the type that causes aspergillosis, a respiratory disease. Offer sprouted seed in small amounts that will be eaten within a few hours, especially in warm weather.
Pests and mold prevention
- Rinse and drain sprouting seeds two to three times per day. Sitting water is the single biggest driver of mold and bacterial problems.
- Use clean equipment every time. Sanitize jars, trays, and lids between batches with a dilute bleach rinse and let them air dry completely.
- Keep your sprouting setup away from direct sunlight during the germination phase. Heat spikes accelerate mold growth.
- Don't mix seeds with very different soak and sprout times in the same jar. Millet (8-hour soak) and sunflower (1 to 2 hours) have different timing needs, and mixing them can leave some seeds waterlogged while others are still dry.
- If you're growing into soil outdoors, watch for fungus gnats and rodents. Birdseed is food, and outdoor plantings in moist soil attract pests quickly. A light covering of soil and a physical barrier like row cover helps in the early days.
Troubleshooting quick-reference
| Symptom | Most likely cause | Fix |
|---|---|---|
| Nothing sprouting after 7 days | Dead or sterilized seed; treated seed; too cold | Run germination test; check temperature; try fresh untreated seed |
| Mold appearing in 1 to 2 days | Too much moisture; poor drainage; contaminated equipment | Drain more thoroughly; sanitize container; reduce soak time |
| Sprouts yellow and leggy | Not enough light after initial sprout stage | Move to indirect light once root tips appear |
| Some seeds sprout, most don't | Mixed viability in the bag; different species with different needs | Separate seed types; test each individually |
| Sunflower hulls not dropping | Hulls need help; seeds not pre-sprouted long enough | Pre-sprout longer before moving to greens stage; cover tray to help hulls loosen |
| Sour or fermented smell | Bacterial activity from standing water or warmth | Discard batch; sanitize; improve drainage and airflow in next attempt |
FAQ
How can I tell which seeds in a mixed bag are most likely to germinate before I test them?
Separate the bag by visible type first, then prioritize intact sunflower kernels and millet. If you see mostly cracked corn, hulled grain (oat or wheat pieces that look processed), or a lot of odd fragments, expect low germination. Still, only a germination test confirms viability, because storage and seed treatment can make “healthy looking” seeds fail.
If my paper towel test shows poor germination, is there any way to salvage the batch for sprouting?
Sometimes, but only if you have partial viability. If you are getting a small number of sprouters, you can still try for quick greens with a lower expectation and larger sowing area. If you get zero after a full week, it is usually not worth continuing, because the seeds are likely dead or treated. Do not rely on smell or appearance to decide.
Can I improve germination by soaking birdseed before the paper towel test?
Soaking can help some seeds start the process, but it can also increase the risk of rot if the seeds are already low-viability or contaminated. If you soak, keep it short and controlled, use clean water, and drain well. A safer approach is still the paper towel method at a steady room temperature, because it reveals viability without leaving seeds sitting in water.
What should I do if the paper towel test seeds mold but some are still sprouting?
Remove and discard any that show fuzzy growth or strong sour odors, then redo the test with fresh towels and cleaner handling. Mold often indicates poor storage condition, excessive moisture, or poor airflow. If you only get a few healthy sprouters and many mold, plan on a patchy outcome and consider using the remaining seed for bird feeding rather than planting at scale.
Is it okay to plant birdseed directly outdoors without sprouting first?
You can, but it is harder to get predictable results outdoors because temperature swings and moisture levels vary. If you plant directly, use shallow coverage as described, keep the planting area evenly damp (not flooded), and expect slower emergence in cooler weather. For faster, more reliable results, sprout in a tray or jar first and then transplant the strongest seedlings carefully.
How often should I check moisture during sprouting, and what’s too wet?
Check at least once or twice daily at warm room temperature. Too wet is when seeds sit in pooled water or towels stay dripping. The target is damp with good drainage, if you can squeeze out excess water, it is usually too wet for long periods. Standing water can stop germination by limiting oxygen.
Do birdseed sprouts need light immediately after roots appear?
Not usually. Most seeds can start in darkness for germination, then light matters once you want green growth. If you give light too early, you may get weaker, pale growth. Once you see a root tip and a small shoot, switch to indirect light so the sprouts green up without drying out.
Can I use sprouted birdseed as food for people, not just birds?
It is higher risk for people because sprouting creates ideal conditions for harmful bacteria. If you choose to eat them, sanitize equipment thoroughly, use clean water for rinsing every time, and keep temperature stable. People who are pregnant, elderly, very young, or immunocompromised should avoid raw sprouts, cooking them briefly reduces risk.
Are birdseed sprouts safe for all birds?
Generally they can be, but offer only in small amounts so they are eaten quickly. Avoid feeding sprouts that are moldy, slimy, or smell off, because mold in feeder conditions can cause severe respiratory illness in birds. If your birds do not eat the sprouts within a few hours, remove leftovers to prevent spoilage.
What’s a good way to decide whether to keep going or stop a sprouting batch?
Use a quick decision rule from your germination test results. If your sprout count is below about half (under five out of ten), the batch is usually not worth continuing for planting into lots. If you are only seeing uneven sprouting, you can still keep a small run for greens, but plan for patchiness and consider switching to a fresher, unprocessed mix for bigger projects.
How deep should I plant outdoors for different seeds if the bag does not list ingredients?
Use the seed size cues. Tiny seeds like millet typically need only a shallow cover (a few millimeters). Larger sunflower kernels usually go deeper (about half to one inch range). If you are unsure, start shallower rather than deeper, because many outdoors failures come from seeds being covered too much.
Next Article
What Does Nyjer Seed Grow Into? Planting and Care Guide
Nyjer seed grows into a thistle-like plant; learn how to germinate, plant depth, light, care, and when it flowers.